This article is written with Microsoft Outlook 2010 in mind, but the settings will be very similar on other versions of Outlook.
If this is the first time you have opened Outlook, it should take you directly to the screen where you will add a new account.
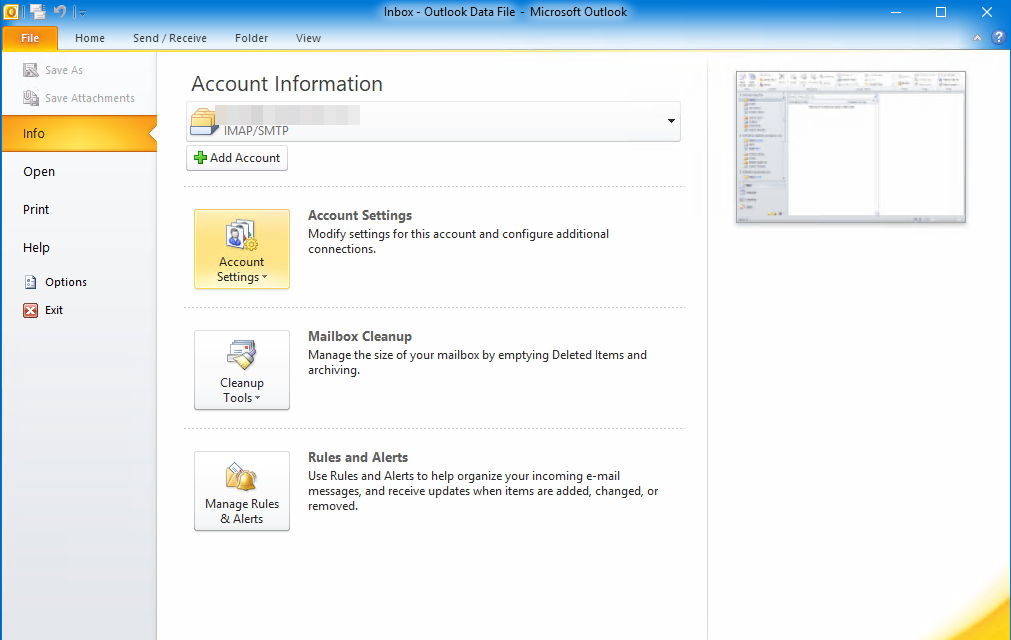
If you are adding an Additional e-mail account to Outlook, or if you need to Modify the configuration for an account, you will need to select File, then Info, and then Account Settings:
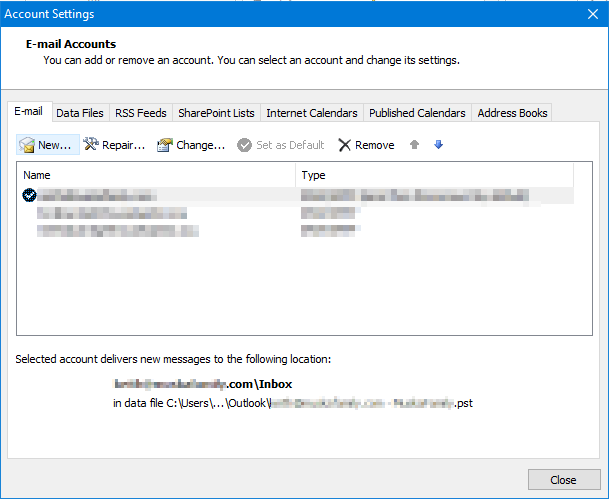
The next screen will show you any existing e-mail accounts you already have configured. If you need to modify an existing account simply double click on that account. To Add a new e-mail account, click the New button.
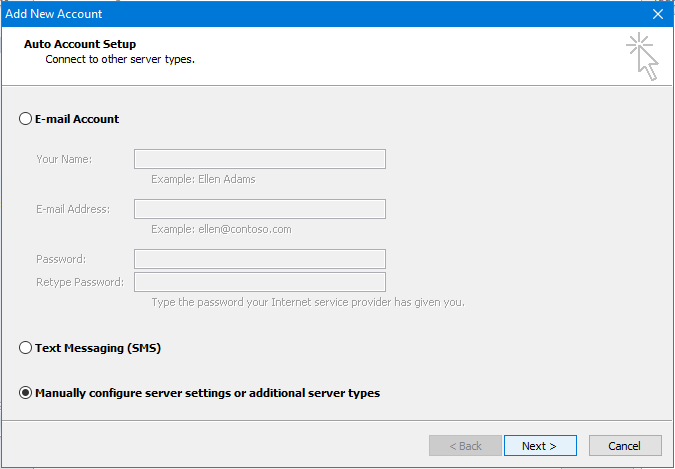
If you clicked the New button to add an additional account, you will need to select Manually configure server settings and click Next:
On the next screen, Select Internet E-mail and then click Next.
The following Screen is where you will begin to enter your E-mail Details.
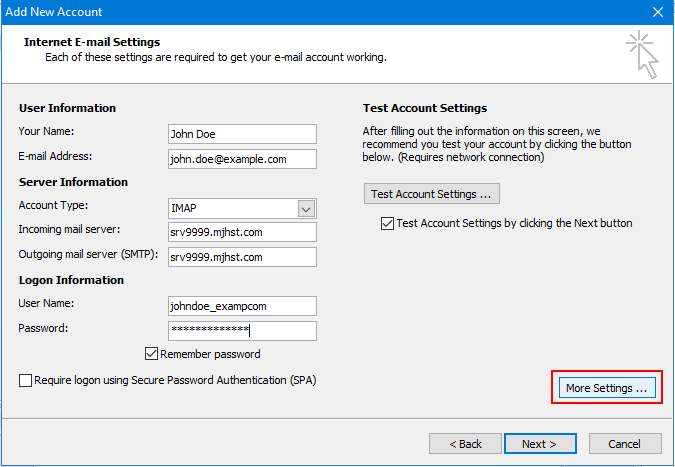
Complete the Your Name, and E-mail Address boxes.
Select your Account Type. POP3 will download message from the server and store them on your computer and Remove them from the server. IMAP will store the messages on the server, and show you a copy of those messages. If you plan to check this same account from any other devices, such as a Mobile Phone or Tablet, we recommend using IMAP so you can see all of the mail on all your devices.
Complete the Incoming mail server, Outgoing mail server, User Name, and Password fields using the mail account details you received, then click More Settings:
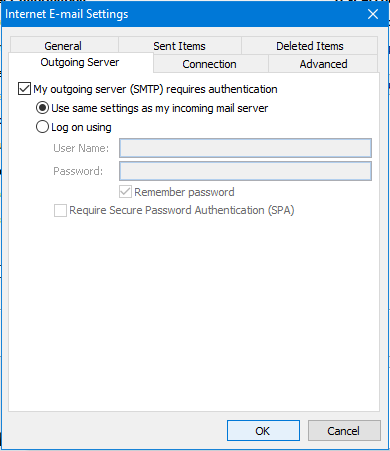
Select the Outgoing Server tab, and make sure My outgoing server (SMTP) requires authentication option is Checked. (This is the step most often overlooked)
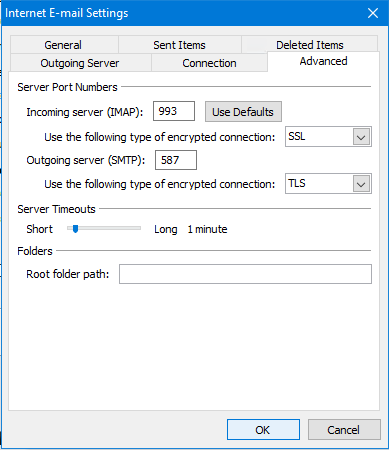
Next, switch to the Advanced tab.
Under the IMAP section, change the encrypted connection option to SSL. This should automatically change the IMAP Port to 993.
Then, under the SMTP section, change the encrypted connection option to TLS. Then change the SMTP Port to 587. Click OK.
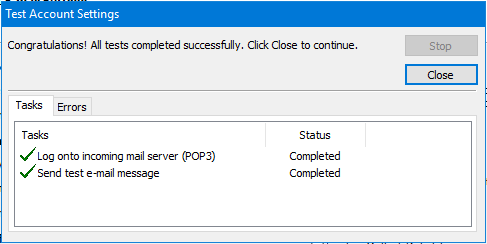
You should now be back at the Add New Account screen. Click the Test Account Settings button and wait for the tests to complete.
Both tests should show a Status of Completed with two green check marks:
At this point, you can click the Close button on the Test screen. Click the Next button on the Add New Account screen. And then click Finish on the last screen.
Close the Account Settings screen, and switch back to the Home tab. You should now see your new e-mail account listed.
If you have any trouble following these instructions, please feel free to reach out to our Support Staff. Thank You!
