The following screenshots will guide you through adding your Zimbra E-Mail account to your local Outlook application.
The following screenshots were taken from Outlook 2010, but should be very similar to other Outlook versions.
Upon selecting Add New Account, you will be presented with a screen similar to the following:
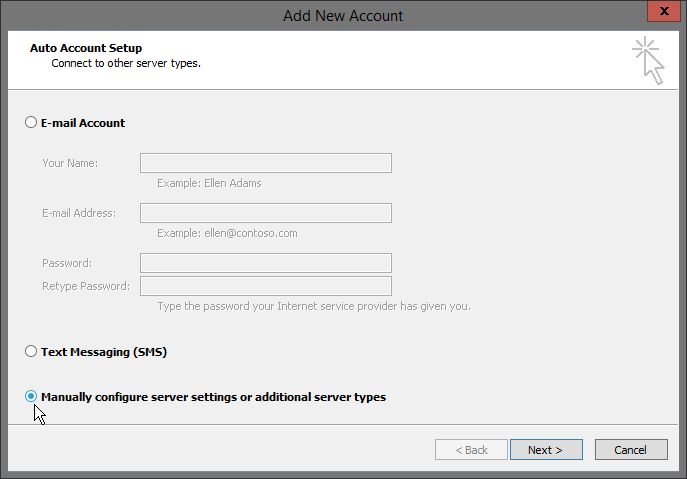
Select Manually configure and click Next

Select Internet E-Mail and click Next
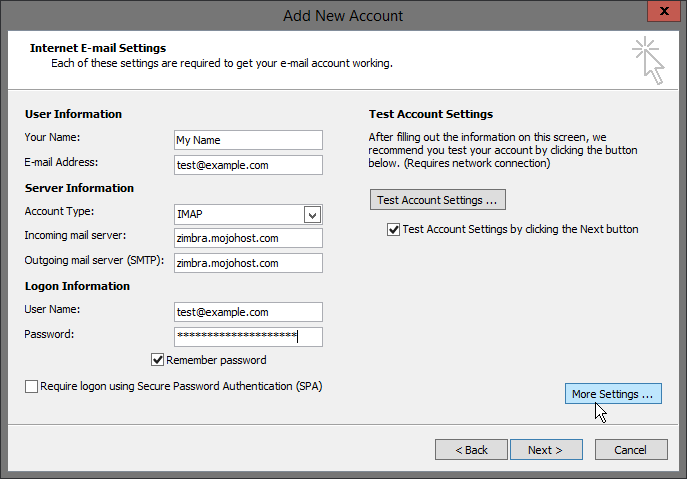
Complete the form with the following information:
           Your Name: This is the name that people will see when you send them an E-Mail.
      E-mail Address: Enter your E-Mail address
        Account Type: IMAP
Incoming mail server: zimbra.mojohost.com
Outgoing mail server: zimbra.mojohost.com
           User Name: Same as your E-Mail address
            Password: If you are unsure of your password, please contact Support
Select the Remember password checkbox, and then click More Settings
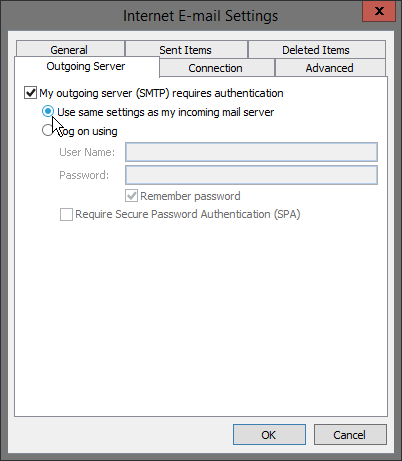
On the Outgoing Server tab, Check My outgoing server (SMTP) requires authentication and ensure that Use same settings as my incoming mail server is selected.
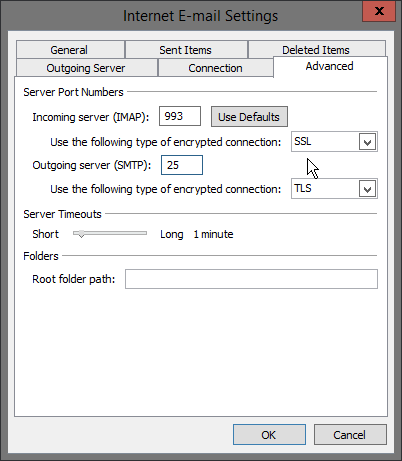
On the Advanced tab, change the Incoming server (IMAP) Port from 143 to 993 and select SSL in the first option box.
Leave the Outgoing Server (SMTP) port set to 25 and select TLS in the second option box.
Click OK and you will be taken back to the Add New Account screen.
Click OK and Outlook will run the connection tests.
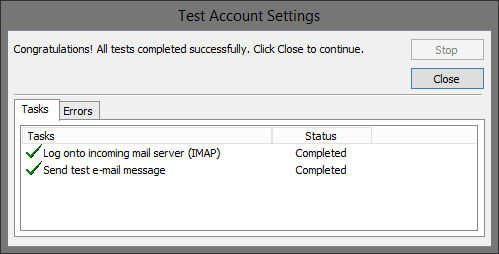
You should receive a message Congratulations! All tests completed successfully.
Click the Close button.
You have now successfully configured Outlook to work with your Zimbra E-Mail Account!
