Installing Duplicati 2.0 as a System Service in Windows
Download Duplicati here:
https://www.duplicati.com/download
Once you have downloaded the MSI File, run it.
Accept the GPL License and click Next.
On the Custom Setup screen, Click the "Launch Duplicati at startup" option, and select "Entire feature will be unavailable"
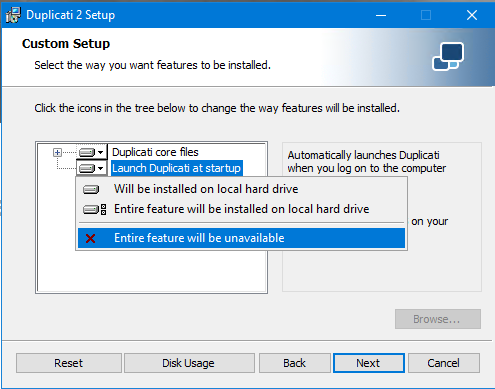
Click Next, then click Install
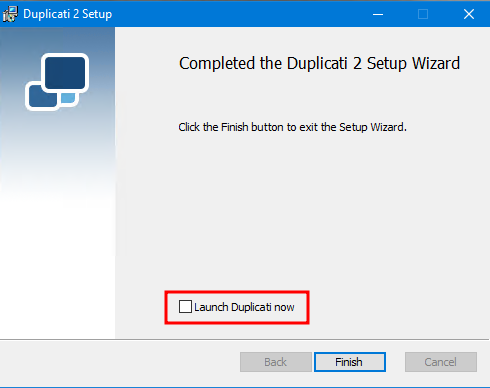
Once the installer has finished, Uncheck "Launch Duplicati now" and click Finish.
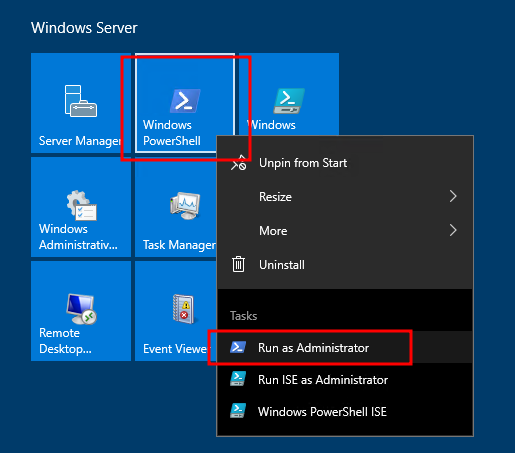
Open the Start menu, and find Windows PowerShell. Right click and select "Run as Administrator"
Navigate to the Duplicati install directory:
cd 'C:\Program Files\Duplicati 2\'
Install the Windows Service:
.\Duplicati.WindowsService.exe install
Close the PowerShell window.
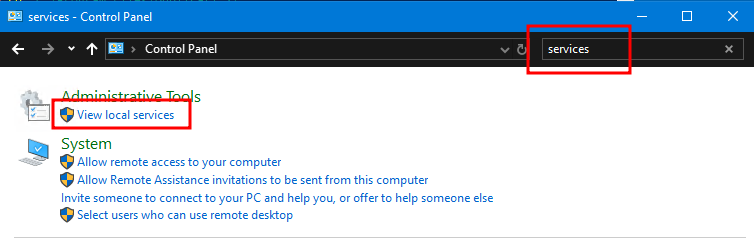
Open the Start Menu, then open Control Panel.
Search for "services"
Then select "View local services"
Scroll through the list of Services until you find "Duplicati service"
Right click, and select "Start"
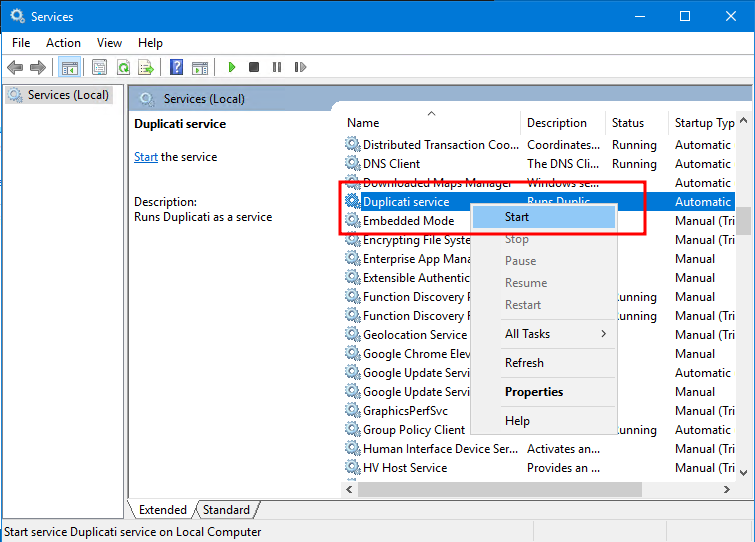
Duplicati should now be running in the background.
Open a Web Browser and enter the following in the Address bar:
http://localhost:8200/
Here you will see the "First Run Setup" where it will ask you to set a Password.
Click Yes. This will take you to the Settings page.
Check the "Password" checkbox, then enter and confirm your desired Password.
Scroll to the bottom of the Settings page, and click OK.
Now you will get a message that says you are "Not logged in". Click OK.
Enter your Password.
Now you will be shown the Home page, which is blank.
From here, click Add Backup
Select Configure a new backup and then click Next.
On the "General backup settings" page;
Name your backup. If this will be a full system backup, you can just enter the server's Hostname.
I strongly recommend entering a Passphrase. This will be used to encrypt your backups that are stored on Object Storage.
The passphrase should be different than the password you used to access the admin interface.
Click Next.
Now you will be shown the Destination screen.
Under "Storage Type", select "S3 Compatible"
Check "Use SSL"
Under "Server", select "Custom server URL"
Enter the Endpoint for your S3 Account (Such as "us-north-2.mojocloud.com" for example)
Enter a Bucket Name to be used to store your backups. Dots "." are not allowed in bucket names, so we recommend using your Hostname with Hyphens "-" instead of Dots.
Such as "windows-example-com"
The Bucket Region and Storage Class can be set to default
Folder Path can be left blank if this windows server will be the only one using this bucket.
If you have multiple Windows Servers to backup, I recommend using separate Buckets instead of subfolders in the same bucket.
Enter your Access ID and Access Key that was provided.
Leave "Client library to use" set to the default of "Amazon AWS SDK"
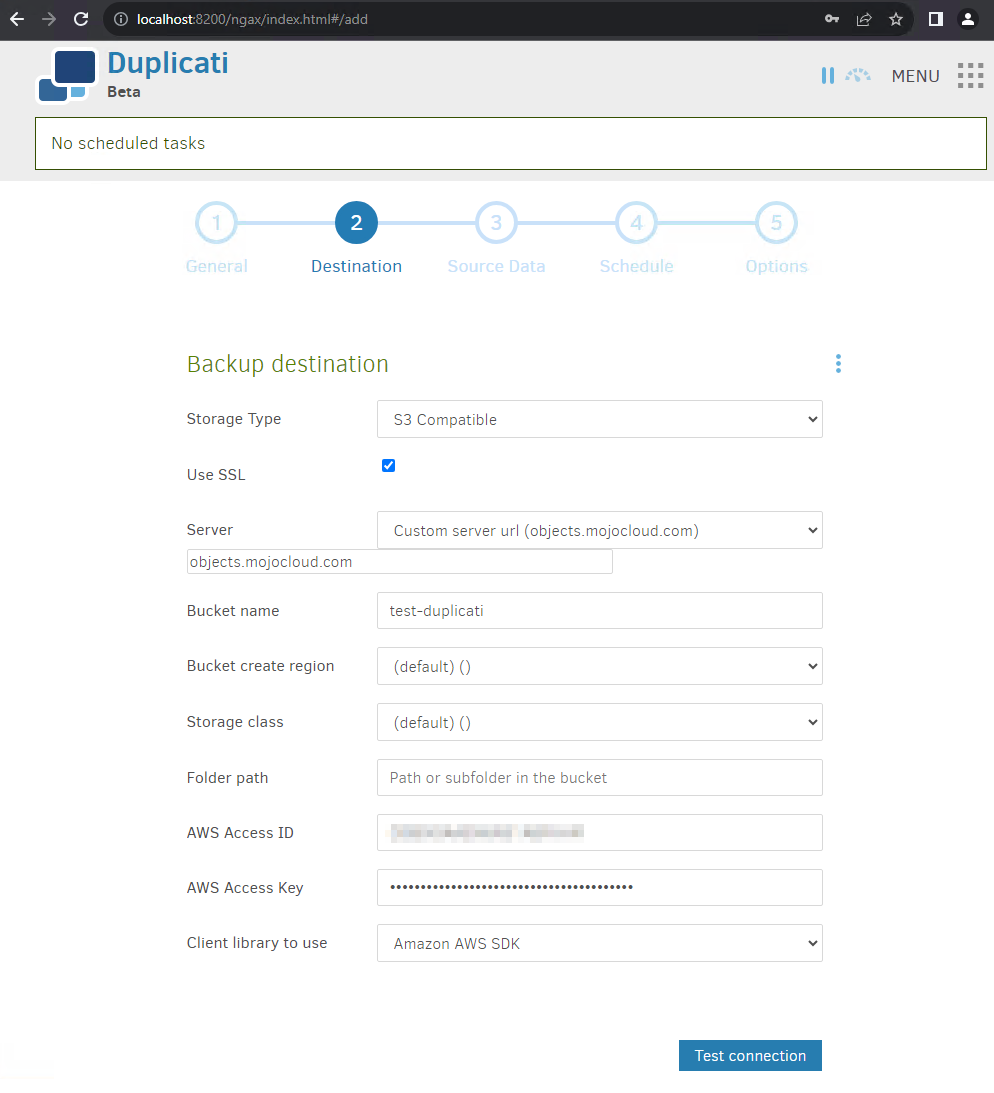
Click "Test connection"
You may get a message: "The bucket name should start with your username, prepend automatically?".
This message assumes that you are running Duplicati in User Mode, and not as a Windows Service.
You can click "No" here.
You may get a message: "The folder does not exist. Create it now?"
Click "Yes"
You should receive a message "Connection Worked!"
If you receive any errors instead, double check your Endpoint URL, and Access ID and Key.
If the connection test succeeded, click Next
The next screen is where you will configure What you want to backup.
If you require a full server backup, you can place a Check next to "C:"
If you only want to backup user data, you can click the arrow next to "C:", and select each path that you want to backup.
Once you have selected everything to include in the backup, click Next.
The next screen will allow you to set a Schedule to run your backups. Configure your backup schedule as desired and click Next.
The last screen is the Options screen.
You may leave the "Remote volume size" at it's default of 50 MByte.
Under Backup retention, select the option that best fits your needs.
"Smart backup retention" is generally a good option:
Smart backup: There will remain one backup for each of the last 7 days, each of the last 4 weeks, each of the last 12 month
Once you have selected the backup retention that you want, click Save.
You will be returned to the Home screen. You should see the Backup that you just configured. You have the option of running a backup immediately, or you can wait for the next scheduled backup to run.
I recommend logging in to the Admin interface periodically to check your backups and make sure you are not receiving any errors.
